Laser marking seems very simple when a flat metal surface is available. When the marking area is near an edge, corner, bend, step, or another change in geometry, the process becomes more challenging.
Non-flat surfaces are seldom found everywhere on manufactured parts. Sharp transitions, holes, corners, flanges, raised sections, curved areas, and grooves are all features that can be present on metal parts. If it is necessary to identify or brand near such features, the laser must be able to reach the target surface while maintaining its position and focus.
This is why it is important to pay attention to laser marking near edges and corners, and not simply move a laser mark to the edge of a flat part.
Several factors can affect the outcome, including the marking field, surface geometry, focus, positioning, beam angle, and available working area. Pasted markdown
Understanding Laser Marking Near Edges
A flat surface provides a reasonably uniform distance between the laser optics and the marking area. That relationship can vary near an edge or corner.
Some marking designs may reach a region where there is a rapid change in surface height or slope if a sharp change exists between two surfaces.
This can make it harder to maintain the same marking conditions throughout the entire design.
Changes in focal position can also occur with curved or uneven surfaces. It has been found that when a surface is tilted or curved, distortion of a two-dimensional mark can be caused by the surface not meeting the expected focus conditions. Pasted markdown
What Happens When Laser Marking Gets Too Close to an Edge?
The outcome will vary according to the shape of the part and the position and size of the mark.
The marking design may reach too close to an edge, creating a risk that the artwork will extend onto an irregular or sloping surface.
This can affect the appearance, character shape, line width, and contrast.
There is also a practical positioning issue. Although the laser can make the mark, the distance from the edge may be insufficient to allow an accurate mark to be made consistently from part to part.
A slight positional change can become noticeable when the mark is very close to a physical feature, especially in repeat production.
Why Is Focus Important Near Corners?
One of the most critical factors to keep in mind when marking irregular surfaces is focus.
The laser beam is intended to be used within a certain focal range. The mark may be less clear if the surface shifts considerably from the anticipated focus.
It is relatively easy to stay on a single flat surface. The height of the surface may vary rapidly near a corner or step.
That is why specialized 3D laser marking systems are available for complex surfaces. Surface measurement methods have been shown to be effective for controlling the focus of the beam when processing tilted, curved, and freeform workpieces.
While not all edge-marking applications need to be performed with 3D marking, the geometry should be considered before completing the production settings. Pasted markdown
What Are the Implications of Marking Size on Edge Placement?
Large marking designs require more area to work with than smaller ones.
Suppose a component has a small edge margin and a flat surface. A small serial number may fit comfortably, while a large logo could overlap the edge.
The manufacturer should therefore design the artwork based on the entire size of the artwork and not just its center point.
The size of the safe marking area should be determined based on the application geometry and the required repeatability. Pasted markdown
What About Sharp Corners?
Sharp corners can be another problem because the two adjacent surfaces can be very different.
A mark intended for one face should not cross onto the other face unless it has been designed specifically for marking across both faces.
In many production applications, it is easier to confine the marking design within a predetermined boundary of one surface.
This helps maintain steady focus and simplifies inspection of the result.
Why Is Positioning So Important?
Changing the position of the component does not make up for an incorrect setting.
If one part is not aligned in the same way as another, the mark may be slightly closer to an edge or corner. The difference might not be very evident on a large flat area, but it can become a visible production problem when it is close to a boundary.
The importance of accurate fixtures, positioning references, previews, and repeatable part placement is therefore significant.
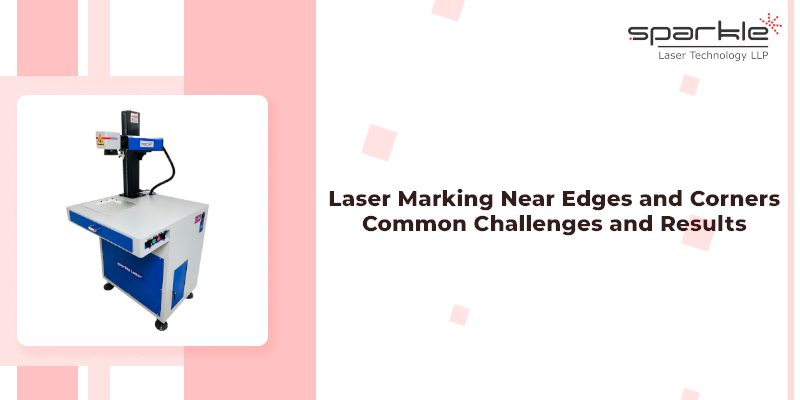
The Mega Laser Marking Machine for Metal by Sparkle Laser features real-time red-beam positioning, boundary preview, and round preview. The machine is also used for marking various patterns, logos, decorative designs, serial numbers, and barcodes on metal parts and products. Pasted markdown
How Does Surface Geometry Affect the Appearance of the Mark?
A mark is not necessarily the same when it is applied to a surface with a different orientation. Surface condition can also influence the final appearance and consistency of a mark, particularly when the marking area has machining marks, roughness, oxidation, or other variations. More information on controlling surface finish before metal engraving can help when preparing parts for marking.
The beam can hit the surface at different angles, such as on a curved surface. This can affect character distortion or consistency, depending on the geometry and marking system.
Uneven and curved laser marking can present a common challenge. Research on 3D laser marking has focused on the influence of surface height and curvature on the processing beam and on focus compensation to improve marking quality.
Research on laser marking of tilted and curved surfaces has also examined how 3D surface measurement can help control the beam focus across complex workpieces.
In cases of moderate variation or simple parts, careful positioning and parameter testing may be sufficient. If the geometry is more complicated, a marking system that can accommodate the surface may be required. Pasted markdown
What Is the Purpose of Boundary Preview?
A boundary preview lets the operator see where the marking design will take place before the marking process begins.
This may be beneficial near edges because the operator can ensure that the design stays within the desired limits.
It also minimizes positioning errors during production. To ensure accurate marking, the physical component can be used to verify the marking area before processing.
Should the Mark Be Moved Away From the Edge?
One-size-fits-all distances are not available.
The required margins are determined by the geometry of the component, size of the mark, required tolerance, fixture accuracy, optics, and production conditions.
The best practice is to create a safe zone through testing.
A manufacturer can decide to allow for a larger amount of positional variation. With a very controlled fixture and consistent geometry, a smaller margin may be used when marking close to a boundary.
The requirement should therefore be determined by the actual production process and not by a general principle. Pasted markdown
What Issues Can Occur With Edge and Corner Marking?
Common issues include:
- Surface erosion at the edges of the surface
- Distorted characters near changing geometry
- Uneven contrast
- Inconsistent focus
- Incorrect positioning
- Differences in marks between components
- Difficulty maintaining repeatability
The key is that these problems can be caused by different factors. Distortion can be caused by the geometry of the part and not by a lack of laser power.
Why Does Higher Laser Power Not Necessarily Lead to Better Results?
Increasing the laser power can seem like an easy fix when a mark close to an edge is weak.
If the problem is related to focus or positioning, however, more power will not fix the problem.
Likewise, if the surface itself changes angle or height, higher energy is not sufficient to bring the geometry of the beam back into the right shape.
Before changing the process, manufacturers should determine whether the problem is related to focus, surface position, laser parameters, or part placement. Pasted markdown
How the Mega Laser Marking Machine for Metal Fits the Application
Sparkle Laser’s Mega Laser Marking Machine for Metal is suitable for marking metal products and includes applications such as serial numbers, barcodes, logos, and decorative patterns.
It has a minimum character height of 0.2 mm, real-time positioning, boundary preview, and round preview in its product information. These features are applicable when the operator is required to place the marking accurately on metal products and verify the marking area before processing.
The actual suitability will vary from edge to edge and corner to corner depending on geometry and marking requirements, and application testing should be continued. Pasted markdown
How Should Marking Near an Edge Be Tested?
The actual production component is the best test.
The test should use the planned marking size and marking position. The operator may then slowly move the design towards the edge and test whether the mark stays within the allowable area and remains clear.
The shape, contrast, focus, and repeatability of the result should be assessed.
Where the component has more than one surface or has a sharp transition, it should also be determined whether the mark should remain on one face or whether a more advanced marking approach should be used. Pasted markdown
Quick Tips for Marking Edges and Corners
Step 1: Determine the Size of the Marking Space
Find the surface area available around the edge or corner that can be used.
Step 2: Check the Geometry
Identify flat, angled, stepped, or curved surfaces.
Step 3: Position the Design
Locate the artwork within a controlled marking area.
Step 4: Use the Preview Function
Check the marking boundary before you begin.
Step 5: Conduct a Sample Test
Test the actual component at the intended location.
Step 6: Inspect the Result
Check focus, appearance, positioning, and repeatability. Pasted markdown
Final Thoughts
Near edges and corners, laser marking is typically not a problem of marking itself, but of positioning and geometry. The surface of the component must provide suitable working conditions for the laser to provide a good result, even when the mark itself is fine.
The result depends on focus, surface geometry, marking size, surface condition, and edge clearance.
If a manufacturer can get a sample that reflects the final geometry, the best way to do this is to test the actual production component itself. Preview functions and stable positioning can be useful tools for operators to accurately place the design before marking.
The goal is not simply to mark as close to an edge as possible. The goal is to identify a position that gives a clear, repeatable mark while keeping it within the required surface area during the production process. Pasted markdown
FAQs
1. Is it possible to mark near the edge of a metal object with a laser?
Yes. Feasibility depends on part geometry, the size of the mark, focus, positioning accuracy, and the available marking area.
2. Why do marks get distorted near corners?
Changes in surface height or surface angle can change the focus conditions of the laser and the interaction between the laser and the surface. Beam focus may need to be controlled on more complicated curved and uneven surfaces.
3. What happens if a marking goes beyond the edge?
One or more components of the design might be missing, misaligned, or located outside the specified surface. Hence, boundary checking and proper positioning are crucial.
4. Does boundary preview assist in edge marking?
Yes. A boundary preview provides a way to preview the marking region before processing. The Mega Laser Marking Machine for Metal from Sparkle Laser features boundary and round preview.
5. Are the same laser parameters suitable for all edge-marking tasks?
Not necessarily. Application-specific testing may be required depending on the material, surface geometry, marking size, focus, and desired result. Pasted markdown