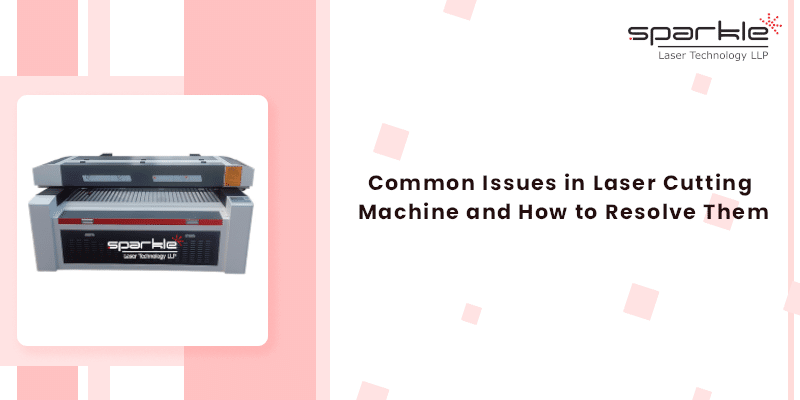
Laser cutting is the foundation of many modern fabrication processes. Wood, acrylic, and industrial high-precision parts can all benefit from laser cutting technologies’ ability to produce high-quality parts quickly with precision, while at the same time producing complex shapes with clean edges.
However, laser cutting machines must operate properly, reliably and efficiently to be able to provide the best cutting accuracy.
Laser cutters can develop signs of wear and tear, misaligned parts and diminished manufacturing capability, which will affect not only the machine’s efficiency but also the manufacturer’s productivity and the quality of the laser cut parts produced.
Generally, the understanding of common problems that arise with laser cutter machines is not only beneficial for technicians but also for the general public who wants to avoid downtime, minimize repair costs, and maximize profits by creating high-quality products. By understanding the causes of these problems, you will be able to prevent the need for costly repairs and to keep your projects on schedule.
This article will detail the working of a laser cutter machine, the most common problems of laser cutting machines, the reasons for these problems, and what you need to do to fix them. Whether you are an individual trying to optimize the laser cutting parameters of your laser cutter, trying to troubleshoot a machine that appears to be performing poorly, or attempting to cut without leaving a burn mark on the product, this article has the answers you need. Let’s explore in detail!
Function of Laser Cutting Machines and Basic Parts
Before looking at laser cutting problems and solutions, it is important to know what parts make up a laser cutting system and how they assist each other.
Principal Elements of A Laser Cutting System
The basic laser cutting system is composed of:
- A Laser source (CO₂ tube, Fiber laser module, or Nd:YAG generator).
- Optics (Mirrors and Lenses).
- CNC Controller (for precision movement).
- Cooling Equipment (Chillers or Water Cooling Systems).
- Assist Gases (such as Oxygen, Nitrogen, or Air).
- Cutting Bed or Work Table.
These components work together to create a concentrated laser beam that melts, burns, or vaporizes a material. When one of these parts has a quality problem, the quality of your laser cut will greatly suffer.
Types of Lasers Used For Laser Cutting
While all types of laser machines work on the same principle, they all perform their tasks in different ways.
The following types of lasers are used for laser cutting:
- CO₂ lasers are best used for materials such as Wood, Acrylic, Fabric, and for some metals.
- Fiber Lasers are designed for cutting metals at high speeds, using less energy and requiring little to no maintenance.
- Nd:YAG lasers are used for extremely accurate laser cutting applications, such as micro-cutting and engraving.
Each of these types of laser cutting machines operates differently, and thus the methods for troubleshooting each type of laser cutting machine are also different from each other. For example, the parameters for a fiber laser cutting are vastly different from those of a CO₂ laser cutting, especially with regards to power, focus, and type of assist gas used.
Common Issues in Laser Cutting Machines and Their Causes
Let’s break down the most frequent laser cutting machine problems, their symptoms, causes, and how to fix them.
Inconsistent Cutting Quality
Inconsistent results are one of the most frustrating problems faced by the fabricators of laser cutting machines. These types of results may include burn marks, rough edges, or cuts that are not neat. Whichever the case is, many of these problems can typically be fixed easily when the root cause is understood.
Symptoms
- Burnt edges.
- Rough, jagged, melted edges.
- Wavy or uneven cutting line.
- Heavy dross accumulates below the sheet metal.
If any of these symptoms are noticed, then you are likely not following the best practices for laser cutting.
Causes
- Improperly focused laser beam.
- Low/degraded laser output.
- Dirty optics or cracked optics.
- Incorrectly set cutting parameters.
- Wrong assist gas pressure.
Even a slight difference in the laser cutting parameters will produce visible defects.
Solutions
- Recalibrate Focal Point: A small adjustment to the height of the lens will greatly affect the cutting accuracy of the laser. Optimize the focal point for the thickness of the material.
- Clean or Replace Optical Parts: Accumulated dirt, smoke, and micro-scratches reduce the intensity of the laser beam and distort the laser path.
- Adjust the Cutting Speed and Laser Power Settings: Cutting too fast will result in incomplete cuts and cutting too slowly will lead to burning and melting.
Laser Not Cutting Through Material
This is the most common issue, and it commonly occurs when the laser’s beam intensity drops or has an incorrect configuration set for laser cutting.
Symptoms
- The cuts do not penetrate through the material completely.
- The laser appears weak.
- The back side of the material is still soldered together.
These symptoms lead the user to believe that the laser is not firing as it should.
Potential Causes
- Power loss from older laser tubes or fiber modules.
- Incorrect focal distance.
- A dirty or fogged lens.
- Incorrect thickness of material and incorrect current settings.
- The incorrect mix of speed, power, and gas.
Solutions
- Ensure that the laser is firing at the correct output level – Laser tubes lose power gradually. Usually, fiber laser sources don’t lose output. However, it may have a little bit of a power change over time.
- Replace aging laser tubes – If your CO₂ laser tube is older than its expected life span, no amount of tuning will bring the laser back to full cutting capabilities.
- Clean All Optics – Even a small amount of dust will obstruct your laser beam and lower the output power of the laser.
- Check that the material you are trying to use is compatible with your laser – Every laser will have a maximum thickness for processing, and every material will require a specific laser cutting setup.
- Adjust your settings based on the material thickness that leads to full penetration.
Excessive Edges Burrs and Dross
When finishing parts with a laser cutter, excess dross can ruin the appearance of your part while also increasing the time it takes to complete the job. No metal laser cutter user wants that to happen.
Reasons for Excessive Burrs or Dross
- Low assist gas pressure.
- Using an incorrect cutting speed.
- Misalignment of beam or lens.
- Unstable working conditions of your laser cutting machine.
Ways to Resolve These Issues
- Increase the amount of gas being supplied –The amount of nitrogen or oxygen that is supplied must be sufficient in PSI to effectively clear the molten metal from the edge of the steel/metal.
- Adjust the Cutting Speed – Cutting too slow can lead to excessive heat buildup on the edges and therefore create an excess buildup on the edges of the part being cut. Cutting too fast can result in incomplete melting away of the metal.
- Check the Alignment of the Optical Beam – A misaligned beam hitting the metal at an incorrect angle reduces accuracy when cutting with the laser.
Overheating and Thermal Damage
The Overheating and Thermal Damage issue refers to the effect that can occur due to over-heating of laser cutting systems wherein it has a negative effect on how a laser cutter cuts materials, particularly with respect to thinner materials and sensitive substrates due to how easily it performs while cutting them up. Even high-end laser cutting systems have difficulty with cutting if the ambient temperature of the zone exceeds the maximum allowable limits within the laser cutter for cutting operations.
Signs of Overheating and Thermal Damage
- Burn Marks Created from the laser.
- Warped Bending or Rippling of Thinner Materials.
- Altered Color/Heat Affected Area.
- Longer Cutting Times and Reduced Characteristics of Quality of Laser Cut Parts.
Thermal Damage or Overheating is often very obvious because of aesthetic issues that make it look less than acceptable, which ultimately will lead to dissatisfaction of customers.
Causes of Thermal Damage to Laser Cut Parts
- Too slow cutting speed
If the laser cutting head travels too slowly over the work-piece to be cut, too much heat will be concentrated on one area of the work-piece and will cause burn marks around the edges of the work-piece.
- Too Much Laser Power
Even though it may seem like adding more laser power makes your parts look better, it may not be true because you may not have set your laser power levels for proper cutting through the thickness of the material you are working with.
- Chiller and cooling water
Check to see:
Water Levels
Dirty Water
Misalignment of The Laser Beam
Misalignment of the laser beam is said to be one of the main causes of lost accuracy with laser cutting. Over time, vibration, movement, and wear cause the optics to move, and thus your cuts become misaligned.
Possible Symptoms of Misalignment
- Cut on the laser beam’s axis is no longer typical, but instead it starts to move sideways or down the path.
- Saw cuts show signs of wear/deterioration through time.
- Specified angles for laser cutting operations cannot be achieved (angles during cut).
Causes of Misalignment
- Vibration During Operation
- High Speed and Shaky Worktables
Loose Screws in Mirror and/or Rail Mounting Assemblies
Loose screws on mirrors or rails and/or parts on laser machines used for cutting are easy to misalign and cause sawing cuts to be wider or more uneven than what is expected.
Long-Term Use Without Calibration
Most CO2 lasers should be realigned and calibrated regularly.
Solutions to Misalignment
Perform Regular Mirror Alignment
An important part of keeping the laser cutter operating effectively, as well as ensuring straight and clean cuts.
Tighten Mechanical Components
This includes: rails, mirror holders, lens mounts and bolts (frames).
Use Alignment Tools
You can use alignment jigs, red dot pointers, or paper burn tests to verify that the laser beam is still in alignment.
Machine or Computer Software Not Functioning
The reason for your equipment not working may not be mechanical. A machine that will not start or take files can halt production completely!
Reasons that Cause the Problem
- Firmware Problems
Outdated or corrupt firmware can be the reason your equipment does not respond.
- USB and controller failure
Loose ports, broken cables or defective controllers prevent proper communication.
- Wrong File Types
Not all types of files will work on all machines. You should check that the files you are using will work with the machine you are using, or this could lead to problems.
- Corruption of design files
These errors are sometimes due to design software (CAD/CAM) creating glitches in the file that cannot be read by your machine.
Solutions
- Reboot Controller and Software
An old tactic, yet still a good one, is to do this process because it returns those temporary communication failed messages to an operational state.
- Firmware Update
The manufacturer at times has provided an engaging update to the Firm Ware for ‘stabilization and corrected’ a lot of common problems of lasers cutters, giving manufacturers the ability to resolve the issue.
- Re-export File to Supported Type
Once you have saved your file in one or more of the supported types (such as DXF, AI or SVG), you should then place the file into the folder created above.
- Verify Compatibility of your File
All manufacturers and models create specific file types. Therefore, you should find out the type of file your machine will use and not interrupt your workflow for this reason.
Most individuals tend to think that if they turn their machine on and the laser does not fire, this would indicate that there is a problem. To the contrary, many times you will find that the issue causing this is a software problem, not a hardware issue.
Preventive Maintenance Recommendations for Common Problems
Daily
- Cleaning the lenses and mirrors is necessary to achieve laser cutting accuracy and avoid loss of laser power.
- Make sure that the laser is properly focused at the start of your shift each day, this will keep the same focus settings through the day, thus giving you consistent cutting quality.
- The water level and cooling should always be checked to ensure the laser doesn’t overheat and maintain a protective environment for the laser source.
Weekly
- Debris should be cleared from the cutting bed weekly to allow for uninterrupted airflow and improve cutting quality.
- It is also important to lubricate the rails, belts and moving parts weekly so they continue to move smoothly, stabilizing the cutting process and minimizing vibration.
- Testing the consistency of the laser power using test cuts every week will allow you to detect early signs of dropping performance.
Monthly
- The mirrors should be aligned to achieve a precise beam path, thereby avoiding defects in your cutting operations.
- Cooling water should be flushed and changed monthly to ensure that the machine maintains a stable temperature, which will also give longer service life.
- Test exhaust fans and filters for improved air circulation and less smoke buildup.
Final Summary
Like other state-of-the-art tools, laser cutting machines are powerful, accurate, and versatile. However they also require attention to detail, care and maintenance in order to operate as intended. It is not uncommon for the same types of problems such as an inability to make a clean cut or for a laser’s output to exceed its rated capacity to almost always be due to one of several common issues: Incorrectly configured laser settings, dirty optics, poor alignment of laser source, low-quality or insufficiently circulated cooling liquid, and inadequate airflow to keep the machine cool. These conditions can almost always be fixed easily with simple and practical methods, and through recognizing the symptoms of each early and following the steps for laser cutter trouble-shooting, you can minimize expensive downtime, decrease material waste, and maintain the highest-quality cutting results for all projects.
Routine maintenance checks are necessary for maximizing machine productivity. Yearly preventive maintenance includes cleaning the lenses daily, performing lubricant washes weekly, and calibrating laser settings monthly to prevent most laser machine failures from occurring before they impact production. Consistent routine maintenance will ensure the highest level of precision for your laser cutting machine and will extend the lifespan of your machine by protecting the laser source and other components.
By implementing best practices for laser cutting, monitoring your laser cutting machine’s settings, and performing routine preventative maintenance on your laser cutting machine weekly or monthly, you can operate your laser cutting machine more smoothly, provide cleaner cuts and improve the life of your laser cutting machine, whether it’s a CO2 laser cutting machine or any other type of laser cutting machine.